Ochre Line / Preparing surfaces
How do you prepare a wall for painting?
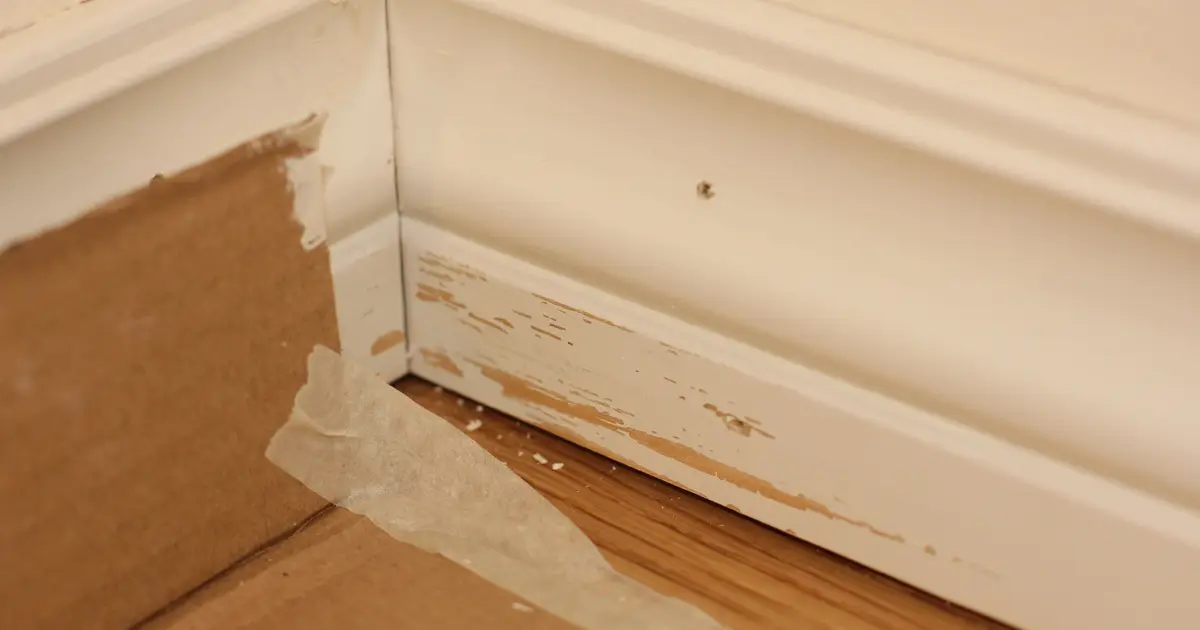
For a sound painted wall, the job is short: clean it, fill and sand any damage, spot-prime the repairs and let everything dry before the first coat. But before any of that, spend ten minutes on three checks that can change the whole plan. Is there damp or mould? Is the textured ceiling old? And is the paint old enough to contain lead?
What follows is arranged by the state of the wall, so skip to the one you have. Almost everything in decorating that goes wrong comes from a problem under the paint rather than the paint itself.
Three checks before you touch anything
Damp and mould
Paint does not cure damp, and it will not stop mould returning. The government's guidance on the health risks of damp and mould is written for landlords, but the principle holds for any home: removing surface mould alone will not stop it coming back unless the underlying cause is dealt with. Look for the reason first, which could be a leak, a blocked vent or a room that never gets aired. If you rent, tell your landlord before you do anything.
Old textured coatings
If you have a stippled or swirled ceiling or wall from before 2000, leave the sandpaper and scraper in the box. The Health and Safety Executive says asbestos may be present in any building built or refurbished before 2000, and it names textured decorative coatings, commonly called Artex, in its list. Its diagram of a typical home shows the same thing. You cannot judge this by eye. The HSE says it is often best to leave such materials where they are if they are in good condition, and not to repair or remove them yourself without the right training. Your council's environmental health officer can advise.
Old paint
Do not dry-sand paint in an older house until you have read our guide to lead paint. This applies above all to woodwork, windows and doors. Sound paint is usually fine to overcoat, which is good news for your weekend.
If the wall is sound and already painted
- Clear and protect. Move what you can, cover the rest, and take off socket covers if you know how to isolate the power safely. If not, cut in around them.
- Wash it. A sponge and a sugar-soap solution, then a rinse with clean water, gets rid of grease and the film that builds up in kitchens, hallways and around light switches. Paint sticks badly to grease.
- Look for damage. Hold a torch flat against the wall in a darkened room. Mark every dent and crack with a pencil, as they will vanish from sight in normal daylight.
- Fill. Rake out loose material. Fill slightly proud of the surface, and do deep holes in stages if the packet asks for it.
- Sand and dust. Sand filler flat with fine paper, using a suitable dust mask, then wipe the wall down.
- Spot-prime. Filler soaks up paint differently from the wall around it. Without a dab of primer or thinned paint on each repair, the patches often show through as dull areas.
Finally run a thin line of decorators' caulk where skirting meets wall, if the gap has opened. That can make a tired room look finished more than any other step.
If the wall is new plaster
Bare plaster drinks paint, and a standard coat on top can dry too fast to grip. It needs two things: time and a diluted first coat, known as a mist coat.
B&Q's guide to painting new plaster says to wait until the wall has turned a lighter, pale pink all over, which usually takes at least a week and sometimes several, depending on temperature and humidity. It suggests two parts emulsion to one part water, in a colour close to your topcoat, and about 24 hours for the mist coat to dry. Advice on the ratio does vary, so if the tin or a plaster primer gives its own instructions, follow those. Dark patches mean the wall is still wet, and painting over them traps the moisture behind the paint.
Avoid vinyl-type paint for this first coat if the plasterer warns you against it, since a less breathable film can hold back the remaining damp. A patch repair on an old wall gets the same treatment on a smaller scale.
If there is mould on the surface
Oxford City Council's advice is a clear guide to the order of work. A small patch can be wiped with a spray containing bleach, following the label, and the cloth thrown away. Larger areas need a fungicidal wash with a Health and Safety Executive approval number. Do not brush or vacuum it, since that spreads spores. Redecorate only once the area has dried out fully and the cause has been dealt with. If you are painting afterwards, the council suggests a good paint containing fungicide. Never paint or paper over mould you have not treated.
If a wall stays damp, or mould keeps returning, get it looked at by a damp specialist or surveyor, and take advice from your GP if anyone in the house has breathing problems that seem to be connected.
If the old paint is shiny
New paint struggles to bond with a glossy surface. For sound woodwork or a sheen-painted wall, clean first and then key the surface lightly with fine abrasive paper, so it looks dull all over. On old paint, use wet abrasive paper rather than dry to keep down dust. A switch between paint types may also need a primer, so check the tin. Our guide to paint finishes looks at what to put on top.
If the paint is flaking
Scrape off what is loose and stop when it holds firm. Feather the edges with abrasive paper, so that the step between paint and bare wall doesn't show, then prime the bare patches. Flaking usually has a cause, such as damp coming through, an old limewash or distemper layer underneath, or paint on a dirty surface. On an old surface, check for lead before you scrape. Soft, powdery old coatings that rub off on your hand are often distemper, and modern paint will not stick to them until they are washed off or properly sealed.
If it is wallpaper
Painting over paper is a gamble. Any seam that has lifted will show, and water-based paint can loosen the paste. Stripping is usually the better job, and it often reveals the real state of the plaster. Mould behind paper is worth watching for, particularly on outside walls.
Order of work on the day
Ceiling first, then walls, then woodwork, with each surface given its full drying time. Masking tape goes on only when what it covers is dry to the tin's recoat time, and it should come off before the new paint has fully hardened. Open a window while you work. Our note on VOCs says why.